Latest Entries »

Oct 6, 2009

Point of Sale

In an organization the parties/debtors may not pay the full amount in cash or cheque. In this case we have to create a new voucher named "Point of Sale" under sales. It will help in keeping records of how much the payment is made on credit card or through voucher or through cheque or cash.

First you have to create a voucher by going to Accounts Info -> Voucher Types -> Create -> Give the name as 'Point of Sale' -> Then type of voucher as 'Sales' -> Set POS invoicing as yes -> In place of print message 1 you can give an ending message you want to convey to your customers -> Give name of class as 'POS'.

Then select the name of the company whose vouchers are used and the banks where the amount for credit cards and cheques will be deposited and then give the percentage to be allocated.

(If you see that you have not created a required ledger then press ALT + C. You can create a new ledger. Same method is applicable in case of stock items and other fields)


To bring the mode Point of sale got to Accounting vouchers and then press F8 and from there chosse Point of sale and select POS invoicing. Then pass the voucher. If the modes of payment are not given then press Ctrl + P.

Linking Price List at Customer ledger account

At the party/debtors ledger or alteration screen the appropriate price list at the 'Price Level Applicable?' field, which will be applicable for the selected party.

Price List and Price Level

Some organizations may use different prices for different customers. In Tally, you may create different price lists and enter the price and discount rates of each item for the related period. During invoice entry, select the appropriate price list to carry the rate in the sales invoice. You don't have to give the rates of discount, they will take it automatically as you select the price list.

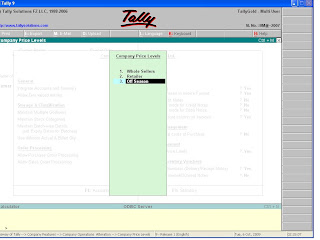
In order to enter the rates first press F11 and then F2. Set 'Separate Discount Column' and 'Multiple Price Level' as 'yes', there you have to enter the names of different price levels. For example whole-sellers, retailers, of season etc. Then press enter if you have written all the names.

Then go to Inventory Info from Gateway of Tally and select price list there and press enter. Enter the following information there and save it.

Then apply it in vouchers entries.

Oct 5, 2009

Voucher Entry using Cost Centre Class

During voucher entry, select the cost centre class at the 'Cost Centre Class' field from the Auto Cost List and pass the entry as you would have done in normal circumstances without any cost allocation. Cost allocation will be made automatically based on the rate specified by you at the time of creation of that cost centre class.

Cost Centre Class

Cost Centre Class can be used to automate cost allocation of ledger amount to specified Cost Category(s)/Cost Centre(s). At the time of voucher entry, the cost is automatically allocated to the Cost Centres, specified at the time of cost centre class creation. It saves a lot of time.

In order to use the cost centre class features, press F11 then press F1. In the screen set the option 'Use pre-defined Cost Centre Allocation during entry?' to 'yes'.

Then give a name to the Cost Centre Class you are creating. Then you will get a new screen where you have to enter the following information:

Cost Category: Select the parent cost category, for which you want to use the class, from the list of categories that appears on the right side.

Name of Cost Centre: Select the cost centre from the list of cost centres falling under the cost category selected in the cost category name field.

Percentage: Enter the percentage of cost to be allocated to each cost centre, based on which, cost allocation will be made.

Cost Allocation in Voucher

The ledger for which Cost allocation i.e. cost category and cost centre is applicable, should have the option ' Cost Centres are applicable?' set to yes at the time of ledger creation or alteration.
Then at the time of passing a voucher entry when you will select that ledger and enter the amount involved against the ledger, the Cost allocations for that ledger will appear. Here you have to specify the Cost category(Department/Branches/Executives) and then name of the Cost centres(Bangalore/Mumbai/Kolkata/Dehli) from the list of Cost categories and list of Cost centres.
Type the amount for that particular cost centre in the amount column. You can allocate cost to multiple cost centres if the total amount entered for that cost centre is less than the total amount involved in the transaction.
Once you specify amount to cost centres under one cost category you can go for selection of another Cost catagory just by pressing Enter to move to the next field.
Related Posts with Thumbnails

Important Links and searches

Your Ad Here