
In order to view the reports select Display from Gateway of Tally, go to Statutory Reports and select TCS Reports. Three different reports can be viewed through the TCS Reports.
Latest Entries »
Oct 26, 2009
Oct 25, 2009
Challan Reconciliation for TCS
After printing the deposit challan, the details of the printed challan are entered through the Challan Reconcilliation button(F5). Detailed entry made are Bank challan Number, Challan Date, Bank Branch Code, Cheque number. Accept and save the reconciliation details.
Printing TCS Challan
In order to get TCS challan, click on print button after saving the payment voucher, the voucher printing dialogue box is activated. Then fill up general printing specifications and select 'yes' for Print as challan option.
Payment Voucher Creation of TCS
You can do it by using the TCS helper button, click on the button, TCS filter screen will appear, the details are to be filled up and then the payment voucher is to be created
Or else you have to debit TCS ledger and credit Bank Account for payment of TCS in payment voucher.
Or else you have to debit TCS ledger and credit Bank Account for payment of TCS in payment voucher.
Sales Voucher for TCS
For TCS purpose, you have to go to sales voucher screen, in Invoice mode. Give the normal information there like party name, sales ledger, item name, etc. TCS computation screen displays details of TCS. You can change the rate by changing the configuration i.e. by setting 'yes' at the option 'Allow Alteration of TCS Rate' in the configuration screen.
Sales Ledger Creation for TCS
In order to create Sales Ledger go to Ledger Creation screen and fill it up, set 'yes' in the option TCS applicable.
Party Ledger Account for TCS
Go to Ledger Creation(Gateway of Tally -> Accounts Info. -> Ledger -> Create). At ledger creation or alteration screen of the party from whom TCS is collected. The following information has to be entered :
Is TCS applicable : Set this 'yes' for applicability of TCS.
TCS details screen will appear, enter the following there:
Buyer/Lessee: Select appropriate type from the list given.
Is Lower/No Collection Applicable: Set this as 'yes' if there is any exemption, orelse set it to 'no'.
Section Number : This is set to 206C by default.
TCS Lower Rate(%): Set it as per rate applicable.
Creation of TCS Ledger Account
First go to Ledger Creation screen(Gateway of Tally -> Accounts Info -> Ledger -> Create) and enter the following details:
Name : Enter the name of the ledger account to be opened.For example TCS on Timber Ledger.
Under : Ledger should be created under Duties and Taxes.
Type of Duty/Tax : Select TCS from the list given.
Nature of Good/Contracts/Licence/Lease : Select the nature from the list provided.You can view the details of the TCS rates from Gateway of tally -> Display -> Statutory Info -> TCS Nature of Goods.
Inventory values are affected : Set this as 'No'.
Configuration Set up for TCS
In order to set up configuration for TCS press F11 and then press F3. Set the option "Enable Tax Collected at Source(TCS)" and "Set /Alter TCS Details" as 'yes'. The company deductor/collector details sub screen will appear. Enter the following information there:
- Tax Assessment Number(TAN) : Enter the 10 digit TAN of the company, allotted by the Income Tax Department.
- Income Tax Circle/Ward : Enter the Tax Circle/Ward under which the company is being assessed.
- Deductor/Collector Type : Select the proper option from the given list.
- Name of the person responsible : Name of the official of the company who is responsible for collection and deposit of TCS, is to be given.
- Designation : The designation of the person whose named is mentioned in the previous field has to be entered.
Tax Collected at Source (TCS)
It is the tax collected by the seller from the purchaser for sale of certain goods/transactions mentioned under section 206C of the Income Tax Act, 1961. Some of these goods/activities are- mining and quarrying, tendu leaves, alchoholic liquor, timber, etc. TCS is to be submitted in a specified form within a week from the last day of the month, in which the tax was collected. Payment of tax to the government is to be made in specified branches of banks, authorized to collect tax.
Oct 24, 2009
Printing Form 16A for TDS
The deductor has to give a certificate to the deductee, as proof of deduction of TDS from the party. This certificate is given in different forms which varies with the type of payment.
In order to Print Form 16A, go to Gateway of tally -> Display -> Statutory Reports -> TDS Reports -> Print Form 16A. Select the TDS party ledger from the list, specify the details to get Form 16A printout.
In order to Print Form 16A, go to Gateway of tally -> Display -> Statutory Reports -> TDS Reports -> Print Form 16A. Select the TDS party ledger from the list, specify the details to get Form 16A printout.
TDS Reports
In order to view the TDS report go to Gateway of Tally -> Display -> Statement of Accounts -> TDS outstanding. The various reports can be viewed through the options available at TDS Outstanding menu.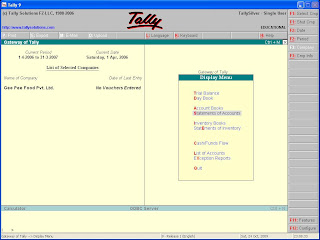

Challan Reconciliation
You can use the details of the TDS challan and information previously saved, for future reconciliation purpose. After printing the deposit challan, the details are entered through the Challan Reconciliation button(F5). Bank challan Number, Challan Date, Bank Branch Code, Cheque Number are the detailed entry made. Accept and save it.
Oct 23, 2009
TDS Challan Printing
To print the TDS challan, after saving the Payment voucher, click on the print button. Printing dialogue box is activated. Then fill up general printing specification and select 'yes' to print as TDS challan option.
TDS Deposit to Government
TDS so collected from payments is required to be deposited to the bank. Then challan is required to be created. It can be created using TDS Helper button in Payment voucher mode. It will lead you to TDS filters. Fill up the criteria. Then fill up the following :
TDS ledger : Give the particular expense account.
Deductee status : Give here the information that the company is a company or non-company.
After entering the details select the bank account and then accept payment voucher screen and save the entry.
TDS ledger : Give the particular expense account.
Deductee status : Give here the information that the company is a company or non-company.
After entering the details select the bank account and then accept payment voucher screen and save the entry.
After Deducting TDS, Payment to Party
After the journal entry, the payment entry to the party is to be made. Open the payment voucher(Gateway of Tally -> Accounting Vouchers -> F5) and select the party ledger, to get the screen for bill allocation. Bills which are yet to be paid are shown here after deduction of TDS. Select the bills to be paid.
Expense Booking
You can make payment after deduction of TDS and book the expenses at the same time, using Journal Voucher(F7).
Go to Journal Voucher screen(Gateway of Tally -> Accounting Vouchers -> F7), select the expense ledger in the particulars column and enter the amount in the Debit column. Then select the name of the party, from whom TDS is to be deducted. Press enter. You will be able to view Bill-wise Details.
In Bill-wise Details screen, select the New Ref under Method of Adj., enter other details, then select the TDS ledger from the list, the rate will be displayed automatically. Press 'Y' to accept the voucher.
Oct 22, 2009
Configuration Set up for TDS
In order to set up configuration for TDS in Vouchers so that TDS rates may be altered. Press F12 and then select Voucher entry and press enter. Set the option "Allow Alteration of TDS Rates" as 'yes'. This will help you in making changes in TDS rates.
Creating Ledger Account of Party/Deductee
Go to Ledger Creation(Gateway of Tally -> Accounts Info. -> Ledger -> Create). At ledger creation or alteration screen the party/deductee from whom TDS is to be deducted. The following information is to be provided :
Is TDS applicable : Set 'yes' this option.
Is Lower/No Deduction Applicable : If lower deduction is not applicable then set this option to 'no'.
Ignore surcharge : In certain cases, when the limit for TDS is reached, surcharge on TDS is levied. If this option is set as 'yes', surcharge will be deducted without any consideration to the exemption limit. If this option is set as 'no', surcharge will be calculated, only when the exemption limit is crossed.
Creation of TDS Ledger Accounts
First go to Ledger Creation screen(Gateway of Tally -> Accounts Info. -> Ledger -> Create), and enter the following details:
Name : Enter the name of the ledger account to be created i.e. TDS Account.
Under : Ledger should be created under Duties and Taxes.
Type of Duty/Tax : Select TDS from the list given.
Nature of Payment : Select the nature from the given list.
Ignore TDS exemption limit : For certain payments there is a limit, crossing which, TDS will be deducted. If you set the option as 'yes', TDS will be deducted only when the amount of payment exceeds that limit.
Oct 21, 2009
Company TDS Deductor Details
The following information has to be entered:
- Tax Assessment Number : Enter 10 digit TAN number of the company.
- Income Tax Circle/Ward(TDS) : Enter the Income Tax Circle/Ward number under which the Company is assessed.
- Deductor Type : Two options are there Government and other. Select the right option.
- Name of the person responsible : Here name of the company official responsible for deposit of TDS is to be given.
- Designation : Give the designation of the person whose name has been displayed in 'Name of the person responsible'.
Activating TDS in Tally
In order to activate TDS in Tally, press F11 from Gateway of Tally. Then press F3 or select Statutory & Taxation option. At the screen two options available - "Enable Tax Deducted at Source(TDS)" and "Set/Alter TDS Details". Set these options as 'yes'.
Oct 19, 2009
Tax Deduction at Source(TDS)
TDS is one of the method of collecting Income-Tax under certain circumstances from the assessee. If any specified type of income arises to any person, the Income-Tax Act requires the payer(deductor) of such income to deduct a stipulated percentage of such income at the time of making payment. Only the balance amount is paid to the receiver. The amount deducted as TDS has to be deposited into the Government Treasury, within a specified time.
The TDS is treated as Income Tax payment by the receiver at the time of assessment. A TDS certificate is to be given to the receiver.
Some of the incomes are - salary, interest, dividend, interest on securities, commission and brokerage ,etc
The TDS is treated as Income Tax payment by the receiver at the time of assessment. A TDS certificate is to be given to the receiver.
Some of the incomes are - salary, interest, dividend, interest on securities, commission and brokerage ,etc
Oct 18, 2009
VAT Form and VAT Return
VAT Form
To view the periodical VAT return go to
Gateway of tally -> Display -> Statutory Report -> VAT reports -> VAT Forms. The form for VAT differs according to the state you have selected in the company creation screen.
VAT Return
An assessee falling under the purview of VAT is supposed to file return through Form No. 100. As Tally is VAT complaint it generates the Return based on the transactions entered into. For VAT return form go to
Gateway of tally -> Display -> Statutory Report -> VAT reports -> VAT Forms.
Oct 17, 2009
VAT Payable/Carried Forward
The report displays the VAT amount for each type of transactions together with total Output and Input Tax. It shows the VAT payable/Refundable amount, which is the difference between the Total Output Tax and Total Input Tax.
When Output Tax is greater than Input Tax, VAT Payable is Output Tax - Input Tax.
(Output Tax > Input Tax, VAT Payable= Output Tax - Input Tax)
When Output Tax is less than Input Tax, VAT Refundable is Input Tax - Output Tax. Balance Amount is carried forward to next period.
(Output Tax < Input Tax, VAT Refundable= Input Tax - Output Tax)
VAT Report
To see VAT Reports go to Display from Gateway of Tally and then from there go to Statutory Reports, then from there go to VAT Reports.
(Gateway of Tally -> Display -> Statutory Reports -> VAT Reports)
(Gateway of Tally -> Display -> Statutory Reports -> VAT Reports)
Oct 16, 2009
Branch Transfer when VAT is applicable
For goods transfer from the various branches of the company, no VAT is attracted, but for maintaining proper accounts. Tally provides different VAT classes for inter-branch transfer transaction.
For example if goods are to be transfered from Kolkata branch to Mumbai branch. In this case of branch transfer outward for kolkata branch create ledger named Delhi branch under Branch/Division group.
Transfer out a/c under sales group and set 'Yes' at the option 'use in VAT'. Select Consignment/Branch transfer outwards and set 'yes' at Inventory values are effected.
In the sales invoice , select the delhi branch a/c in the Party's A/c Name field and at sales ledger select Transfer Out Ledger.
In case of transfer inward, create the ledger as Transfer in a/c under purchase group and voucher class is Consignment/Branch transfer inward.
Oct 15, 2009
Rate Difference in VAT
Sometimes it might happen that subsequent to a sale or purchase, the rate per unit of item is revised. In this case, rate difference allowed on purchase or sales are also entered through Debit Note and Credit Note, thus, reducing the purchase and sales value, respectively.
Debit note to supplier
For example your supplier reduces price due to competition and allowed a rate reduction of Rs. 100/each on 5 units of a good supplied to you and issued a credit note for Rs. 520(Rs.100 x 5 + 4% of Rs. 500). Then you pass an entry in Debit note by selecting the name of items and entering the rate difference (Rs.500 in this case) in the amount column and after entering item details, in the next row, press enter and select Input VAT @ 4%.
In the same way you can pass entry in Credit note in case you
VAT in Purchase Return and Sales Return(Debit Note/Credit Note
For passing Purchase return in Tally, Debit note is used and for Sales return, credit note is used. Rate difference allowed by vendor is entered in debit note and when granted to buyer is entered in credit note. Net sales or purchases are taken into consideration for VAT computation.
Sales Return
For example Mr. Rajiv Ghosh returned two monitors worth Rs. 10000/- due to some defects on which VAT @ 4% is charged. Therefore the total value comes to Rs 10400/-( Rs. 10000 + 4% of Rs. 10000)
In this case, select sales @ 4% ledger in the Sales Ledger field in the credit note voucher type. In the item field, give details of item returned worth Rs. 10000. After the items enter, press enter to move the additional aentry area, where you have to select Output VAT@4%, Press Ctrl + A to save the entry.
Purchase Return
For example some goods are returned to supplier due to defects, that are subject to 4% VAT.
In this case, at Debit note field , at purchase ledger field, select Purchase 4% ledger and at item field, enter the details of items, which is to be returned. In the next row press enter to move to the additional accounting entries where you have to select Input VAT @4% from the list of ledger to automatically compute the amount of VAT. Then Press Ctrl + A to save entry.
Oct 13, 2009
More than one VAT Rate Invoice entry
Different goods have different VAT rates(say 4% & 12.5%), and its quiet possible that a trader deals in more than one type of good. In this case the purchase invoice entry can be passed in the following way:
- Create Purchase @ 4% Account, Purchase @ 12.5% Account. It should be under Purchase account with VAT rate applicable like Purchase @ 4%, Purchase @ 12.5%.
- Create Input VAT @ 4% Account and Input VAT @ 12.5% Account under Duties and Taxes and select VAT under Type of Duties/taxes and Input VAT @ 4% and Input VAT @ 12.5% under default Tax and VAT class.
- Create suppliers account under sundry creditors if not created.
- Press F12 -> Invoice configuration -> set no at Use common ledger account and no at Allow selection of VAT/Tax class during voucher entry.
- Give item details at the entry at accounting allocation, select purchase-exempted ledger. Then enter item details for each item, select respective Purchase ledger and select the VAT class for each item.
- After completing the item details, select the input VAT A/c for each rate one by one, to get VAT computed on VAT-able items.
Oct 11, 2009
Sales entry with single VAT rate.
Press F12 -> select Invoice/orders entry configuration -> press enter -> set yes at the option 'Use common ledger for item allocation?' -> press enter.
At Sales @ 4% A/c, select the sales ledger with VAT rate applicable like sales @4%.
Go to Accounting Vouchers from Gateway of Tally and press F8 for sales. There select Sales @ 4% under sales ledger and select sales @ 4% under VAT/TAX class. Enter the item details there. Then after that press enter and select VAT ledger, for example output VAT @ 12%, from the list and provide the rate to be charged. Press Ctrl + A to save the enty.
Oct 10, 2009
Ledgers to be created for VAT
 Create another Sales, Purchase and VAT ledger and enable 'use as VAT return' as yes.
Purchase and Sales Ledger
Then create purchase and sales ledger for each VAT rates, for example Sales @ 4%, purchase @ 4%, sales @ 12%, purchase @ 12%,etc. You can provide any other suitable name too but do set 'yes' at 'Used in VAT return?' to link the ledger to VAT computation and VAT return.
At VAT/Tax class field, select the applicable VAT classification, which would be selected as default on entry of the sales/purchase ledger.VAT Ledger
In the same way create input and output VAT ledger, for example Output VAT @ 4%, Input VAT @ 4%,Output VAT @ 12%, Input VAT @ 12% etc.
Activation of VAT
For Activating VAT(Value Added Tax) :
Press F11 -> Press F3 -> Set 'enable value added tax(VAT)' as 'yes' -> Enable 'Set/alter VAT details' option as 'yes' -> Enter VAT TIN number and PAN number there -> press enter and save it.

Then come back to Gateway of Tally and press F12 then select Invoice/Orders Entry and press enter. Set 'Allow selection of VAT/Tax class during entry' and 'Warn on Mismatch in VAT Rates' as 'yes'. Then save it.
Press F11 -> Press F3 -> Set 'enable value added tax(VAT)' as 'yes' -> Enable 'Set/alter VAT details' option as 'yes' -> Enter VAT TIN number and PAN number there -> press enter and save it.


Then come back to Gateway of Tally and press F12 then select Invoice/Orders Entry and press enter. Set 'Allow selection of VAT/Tax class during entry' and 'Warn on Mismatch in VAT Rates' as 'yes'. Then save it.

Oct 9, 2009
Value Added Tax(VAT) in Tally
Value Added Tax(VAT) is levy imposed on purchase or sale of goods. It cam into effect from 1st April, 2005 in place of State Sales Tax. As a result, the different states of India will have their own state level structure for VAT. The principle rules and regulations governing VAT in various states will remain same, since, they will be based on the 'White paper on State -Level Value Added Tax' released by the Empowered Committee of State Finance Ministers constituted by the Ministry of Finance, Government of India.
Types of Dealers.
A trader having turnover less than specified limit must not register under VAT Act but if they want to avail the facility of Input Tax Credit, they can register themselves. But traders who have exceeded the limit have to register themselves.
Unregistered Dealer.
Dealers having turnover less than the limit are not registered under the VAT act. They can maintain normal accounts in tally.
Registered Dealer.
Under the VAT Act, registered dealers may have either of the following status:
- Composite Dealer : Dealer having turn over less than the limit determined for composition, and have opte for composition scheme. They need not maintain VAT accounts but are required to maintain proper accounts to get the turnover figure for computation of composite tax.
- Registered Dealer : Dealers exceeding the specified limit must register under VAT Act. They can claim input tax credit and maintain accounts properly as per VAT rules.
Budget
We all know, setting up of a budget is an integral part of the job of an accountant, since, it helps in keeping a control over the flow of fund of the organization. Tally allows you to create multiple budgets. There could be a budget for a specific purpose, say for the bank , for the head office, optimistic budget, realistic budget, pessimistic budget,etc. Department-wise budgets can also be created say, marketing budget, finance budget,etc.
Activating Budget.
In order to activate budget Press F11 -> press F1 -> specify 'yes' at the option 'Maintain Budgets and Controls'.
Creating a Budget.
From Gateway of Tally, go to Accounts Info and and select budget. There create a new budget, it will lead you to budget creation screen.
Information to be provided.
Name of the budget can be given as Quarterly budget, Corporate budget,etc.
The top level is primary budget. You can set up more than one primary budget. Under each primary budget, sub-budgets with different names can be created.
Specify the period of budget.
You may want to set/alter the budget for group of ledger accounts or for ledger accounts individually or for cost centres or all of them. We shall take up budget for group first.
Specify 'yes' at group. If you want to set budget for a group, thereby setting budget for all ledgers under the group. Fill in the following fields.
Oct 8, 2009
Post Dated Entries
For post dated entries in any voucher, Press Ctrl + T. Post Dated Entries means that the entry in made now but it wont effect the Profit and Loss Account or Balance sheet. The effect will take place after the actual amount is received.
This entries are useful in cases like post dated cheques are receipt or paid, or in case of bills.
This entries are useful in cases like post dated cheques are receipt or paid, or in case of bills.
Reversing Journal
For Reversing Journal go to Accounting vouchers and press F10. If any mistake is done it can be rectified with the help of Reversing Journal.
There is a possibility that by mistake you have to rectify the mistake without deleting the entry, as deleting the entry will effect the Profit and Loss Account and Balance Sheet.
In this case you have to use Reversing Journal. These adjustment has to be done by placing the proper ledger in debit side and the other ledger in credit side.
Memorandum Voucher
First activate this voucher by first pressing F11 -> F1 -> set 'Use reversing journal and optional' as 'yes'.
For memorandum voucher go to Accounting Vouchers and press Ctrl + F10.
Why memorandum Voucher is used??
This question can be answered by a simple example.
Suppose a employee of a company is being sent to some place for a week or so. Company provides him Rs. 3000 as travelling expenses and tells him that he has to show each and every expenses made by him. In this case the Accountant enters Rs. 3000 as expenses but he unaware of the actual amount at that very moment, he will come to know about it after the employee returns.
In this case, the you will pass an entry n memorandum voucher showing that Rs. 3000 has been given to the employee as travelling expenses. Then after the employee comes back you will come to know about the exact amount and then go to Display -> Day book -> select the voucher entry previously made -> Make necessary changes -> Press F5 for payment/F6 for receipt.If the expenses made by the employee is more than what was paid by the company before then payment has to made, and if the expenses are less then receipt is to be done.
Optional Voucher
If you don't want any entry to be shown in the Profit and Loss Account. Then press Ctrl + L in any place.
It can be done while passing vouchers i.e. receipt, payment, journal, contra, etc. It can be done in any voucher. If you want it to be shown in the Profit and Loss Account then open the entry and press Ctrl + L again.
To change the date press F2.
It can be done while passing vouchers i.e. receipt, payment, journal, contra, etc. It can be done in any voucher. If you want it to be shown in the Profit and Loss Account then open the entry and press Ctrl + L again.
To change the date press F2.
Bank Reconcilliation Statement(BRS)
Reconciling the companies bank accounts with the banker's statement is a fundamental and routine task of Accounting. in Tally Reconciliation can be done for any company.
The process in Tally is linked to the information that is provided while creating bank ledger. You will notice that the moment you select the 'bank account' group for a bank ledger, the field- "Effective Date for Reconciliation" appears. Normally this would be the 'Book Beginning from' date itself. You can also specify any other date reconciliation as per your needs. It may be noted that any transaction prior to the 'Effective Date for Reconciliation' will not be considered for reconciliation purpose. After creating all bank accounts and passing the necessary transaction purpose. After creating all bank accounts and passing the necessary transactions with them you need to reconcile the Bank Book with the Bank Statement.
In order to that perform the following:
Gateway of Tally -> Display -> Accounts Books -> Cash/Bank Book(s).
Select the bank whose balance you want to reconcile. Select the month which the bank balance you want to reconcile. Press F5. Put the dates of clearing amount i.e. the date when the amount goes out of bank.
Oct 7, 2009
Job Costing
Job costing is used in case any project work is going on for the company. Material are sent to different sites where work is going on. These sites can be created through job costing.
First press F11 and then F1, set "Use Cost Centre for Job Costing" as 'yes'.
Go to cost Catagory(Accounts info -> Cost Catagory -> Create) and create a catagory named project or sites. Then go to Cost centre(Accounts info -> Cost Centre -> Create) and create the name of the projects or sites where the work is being done. While creating thes cost centre set 'use job costing' as 'yes'.
Then create godown from where the material are supplied to these site/projects.
Then we have to alter voucher type Stock journal and create a class named job costing there and set "Use class for job costing" as "yes".
Then inorder to transfer the stock item from godown to site/project area, go to accounting vouchers press ALT + F7 select stock journal and class as job costing. Then pass the entry.
Receiving Interest
Go to display -> Statement of Accounts -> Interest Calculation -> Interest Payable/Interest receivable. Press F2 and give the date there.
Then receive interest through Accounting Voucher.
Then receive interest through Accounting Voucher.
Interest Calculation
Create a ledger named 'Investment'.
Then press F11 and then press F1, set "Activate interest calculation" and "use advanced parameter" as 'yes'.
Then Alter the ledger Investment created and set the 'interest calculation option' as 'yes'. There you give the all the information required i.e. the rate of interest, time period, rounding(rounding off the decimal value), etc.
Printing of Vouchers and other documents
An organization may need to Print vouchers, balance, Profit and Loss Account and other documents. In order to print just press ALT + P on the page you want to print.
Negative stock warning
In reality, physical balance of stock cannot go negative, but while passing entry in Tally, if your stock balance is going negative then surely you are making some accounting mistake. You can prevent this by configuring Tally to meet your requirement. Press F12 at inventory voucher screen and activate the option "Warn on negative stock balance?". Now everytime while passing inventory voucher if you enter any quantity which will make your stock negative, Tally will give a warning message displaying the figure by which your stock balance is going negative.
Actual and Billed Quantity entry in Voucher

In many cases, the actual quantity and the billing quantity differs due to supply of free samples, allowances for defective items, etc. Tally enables you to mention both the quantity in invoice voucher just by activating a feature. Press F11 and set 'yes' to the option "Use different Actual and billed quantity?" at the Inventory Vouchers screen. Enter the actual quantity and billed separately in their respective columns. But the value will be calculated based on the basis of billed quantity.
Oct 6, 2009
Manufacturing Entry
It is posssible to maintain Manufacturing inventory in Tally. In other words, an organisation engaged in manufacturing activities can use Tally to record all processes involved in manufacturing. To do so you have to follow some specific steps.

First create a new voucher named Manufacturing Entry under Stock Journal.
Inorder to create the voucher go to Accounts Info from Gateway of tally -> Voucher Type -> Create. There select type of voucher as Stock Journal and set 'Use as a Manufacturing Journal?' as 'yes'.
Then create godown and stocks.
Press F12 and select "Accts /inventory info" and press enter. There set 'Allow component list details(Bills of Materials/BOM)' as 'yes'.
While stock creation incase of stock items which are raw material i.e. it is used for production of the finished good, in this case the BOM option will remain no. But in case of finished goods the BOM option should be set as yes.
Incase the BOM is no.

Incase BOM is yes i.e. the item you are creating is a finished product. So you have to enter the raw materials used for the product and the quantities needed for producing 1 unit of the finished product.
Finally to record manufacturing transaction using the manufacturing journal entry, from the gateway of tally, go to inventory voucher, press ALT + F7 and select "manufacturing entry" and press enter.
Select the name of the finished good from the pop-up list, then select the godown from the list where the finished goods will be stored. Give the number of units of finished goods you want to manufacture . Press enter to save all the materials.
There can be expenses for manufacturing a product, you can show that on the right hand side in terms of percentage or by typing the amount, you have to create a ledger under expenses(direct/indirect). 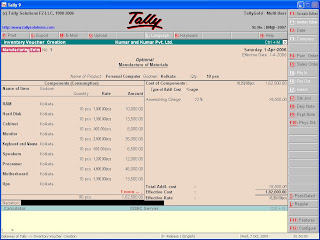
Transfer Stock
You can transfer stock from one godown to another through Stock Journal. Go to Accounting Vouchers from Gateway of tally and press ALT + F7, stock journal will open.
On the left hand side select the name of the commodity you want to transfer and the name of the godown from where you want the commodity to be send and on the right hand side write the destination place of the commodities. The stocks will be transferred.

On the left hand side select the name of the commodity you want to transfer and the name of the godown from where you want the commodity to be send and on the right hand side write the destination place of the commodities. The stocks will be transferred.
Point of Sale
In an organization the parties/debtors may not pay the full amount in cash or cheque. In this case we have to create a new voucher named "Point of Sale" under sales. It will help in keeping records of how much the payment is made on credit card or through voucher or through cheque or cash.
First you have to create a voucher by going to Accounts Info -> Voucher Types -> Create -> Give the name as 'Point of Sale' -> Then type of voucher as 'Sales' -> Set POS invoicing as yes -> In place of print message 1 you can give an ending message you want to convey to your customers -> Give name of class as 'POS'.
To bring the mode Point of sale got to Accounting vouchers and then press F8 and from there chosse Point of sale and select POS invoicing. Then pass the voucher. If the modes of payment are not given then press Ctrl + P.

First you have to create a voucher by going to Accounts Info -> Voucher Types -> Create -> Give the name as 'Point of Sale' -> Then type of voucher as 'Sales' -> Set POS invoicing as yes -> In place of print message 1 you can give an ending message you want to convey to your customers -> Give name of class as 'POS'.

Then select the name of the company whose vouchers are used and the banks where the amount for credit cards and cheques will be deposited and then give the percentage to be allocated.
(If you see that you have not created a required ledger then press ALT + C. You can create a new ledger. Same method is applicable in case of stock items and other fields)To bring the mode Point of sale got to Accounting vouchers and then press F8 and from there chosse Point of sale and select POS invoicing. Then pass the voucher. If the modes of payment are not given then press Ctrl + P.
Linking Price List at Customer ledger account
At the party/debtors ledger or alteration screen the appropriate price list at the 'Price Level Applicable?' field, which will be applicable for the selected party.

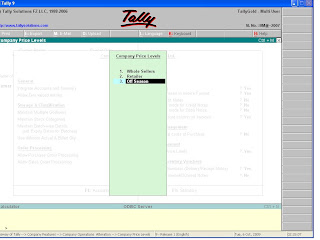
Price List and Price Level
Some organizations may use different prices for different customers. In Tally, you may create different price lists and enter the price and discount rates of each item for the related period. During invoice entry, select the appropriate price list to carry the rate in the sales invoice. You don't have to give the rates of discount, they will take it automatically as you select the price list.
In order to enter the rates first press F11 and then F2. Set 'Separate Discount Column' and 'Multiple Price Level' as 'yes', there you have to enter the names of different price levels. For example whole-sellers, retailers, of season etc. Then press enter if you have written all the names.
Then go to Inventory Info from Gateway of Tally and select price list there and press enter. Enter the following information there and save it.
Then apply it in vouchers entries.
Oct 5, 2009
Voucher Entry using Cost Centre Class
During voucher entry, select the cost centre class at the 'Cost Centre Class' field from the Auto Cost List and pass the entry as you would have done in normal circumstances without any cost allocation. Cost allocation will be made automatically based on the rate specified by you at the time of creation of that cost centre class.
Cost Centre Class
Cost Centre Class can be used to automate cost allocation of ledger amount to specified Cost Category(s)/Cost Centre(s). At the time of voucher entry, the cost is automatically allocated to the Cost Centres, specified at the time of cost centre class creation. It saves a lot of time.
In order to use the cost centre class features, press F11 then press F1. In the screen set the option 'Use pre-defined Cost Centre Allocation during entry?' to 'yes'.
Then give a name to the Cost Centre Class you are creating. Then you will get a new screen where you have to enter the following information:
Cost Category: Select the parent cost category, for which you want to use the class, from the list of categories that appears on the right side.
Name of Cost Centre: Select the cost centre from the list of cost centres falling under the cost category selected in the cost category name field.
Percentage: Enter the percentage of cost to be allocated to each cost centre, based on which, cost allocation will be made.
Cost Allocation in Voucher
The ledger for which Cost allocation i.e. cost category and cost centre is applicable, should have the option ' Cost Centres are applicable?' set to yes at the time of ledger creation or alteration.
Then at the time of passing a voucher entry when you will select that ledger and enter the amount involved against the ledger, the Cost allocations for that ledger will appear. Here you have to specify the Cost category(Department/Branches/Executives) and then name of the Cost centres(Bangalore/Mumbai/Kolkata/Dehli) from the list of Cost categories and list of Cost centres.
Type the amount for that particular cost centre in the amount column. You can allocate cost to multiple cost centres if the total amount entered for that cost centre is less than the total amount involved in the transaction.
Once you specify amount to cost centres under one cost category you can go for selection of another Cost catagory just by pressing Enter to move to the next field.
Cost Catagory and Cost Centre
A company may require analysis of Department-wise costs, Branch-wise costs and Executive-wise costs. Create each of these as a cost catagory. These Cost Catagories will have the individual cost centres under them.
Suppose there are three departments
Suppose there are three departments
- Marketing
- Administration
- Services
and four branches
- Bangalore
- Mumbai
- Kolkata
- Delhi
and four Executives
- Mr A
- Mr B
- Mr C
- Mr D
In this case you have to create 'Department', 'Branch' and 'Executives' in Cost Catagory.
To create cost catagory first press F11, then press F1 and specify 'yes' at the option 'Maintain Cost Centres' and 'More than ONE cost category'.
Then from Gateway of tally -> Accounts info -> Cost Catagories -> Create.
After you have created the Cost Catagories come back to Gateway of Tally by pressing ESC.
Then Create Cost Centres ( Gateway of tally -> Accounts info -> Cost Centre -> Create).
Select 'Department' in place of category and then create Marketing, administration and service, and in the same way by selecting the category as 'Branches' you can create the cities under it. If you see that it has taken the category as 'Department' and you are willing to change it then press 'SHIFT + Tab'.
For deleting any cost category and cost centre go to alter and select the cost centre or catagory and press 'ALT + D'.
Oct 4, 2009
Creating Godown
In order to create a godown first you have to press F11 -> F2 -> 'Maintain Multiple Godown' -> press y i.e. yes -> press enter.
Then go to Inventory Info -> Godown -> Create.
A company may have Godowns in different places, they can maintain stocks of different godowns through this.
Then go to Inventory Info -> Godown -> Create.
A company may have Godowns in different places, they can maintain stocks of different godowns through this.
Creating new voucher
To create voucher go to Accounts info -> Voucher type -> Create -> Create Voucher.
Give the name of the voucher class then select the type of voucher. Then select whichever items should be included or excluded in the voucher. Press enter and then press 'y' i.e. yes to confirm.
To pass entry through that new voucher
Suppose you have created a new voucher under the type of voucher PAYMENT then go to Accounting Vouchers and press F5 then select the new voucher from there.
Oct 3, 2009
Creating stock group and stock catagory
You can create stock groups such as mobiles, Laptops,etc.
And under that you can create stock categories such as samsung, nokia, sony ericsson, etc. under mobile group and lenova, acer, hcl, etc. under laptop group. Under this stock categories you can keep your stock items. This will help the company to maintain its stock items.
To create Stock Group
Gateway of Tally -> Inventory info -> Stock Group.
To create Stock Categories
Gateway of Tally -> Inventory info -> Stock Category.
(Note: If stock category is not shown then you have to activate it. In order to activate it press F11 from Gateway of tally -> Inventory features/press F2 ->'Maintain stock category' -> yes)
Transaction Entry
For making any transaction go to Gateway of tally -> Voucher entry.
Then press F11 and activate 'Allow invoicing' and 'Enter purchases in invoicing format'. Type 'y' i.e. yes to activate these. Then save by pressing enter and at last again y to confirm. Then again press F11 and then F2 and activate 'Allow purchase order processing', 'Allow sales order processing' and 'Use tracking number(delivery/receipt note)' in the same way. After this you can pass any entry through this different vouchers. The vouchers are as follows:
Then press F11 and activate 'Allow invoicing' and 'Enter purchases in invoicing format'. Type 'y' i.e. yes to activate these. Then save by pressing enter and at last again y to confirm. Then again press F11 and then F2 and activate 'Allow purchase order processing', 'Allow sales order processing' and 'Use tracking number(delivery/receipt note)' in the same way. After this you can pass any entry through this different vouchers. The vouchers are as follows:
- F4 for Contra Entry.
- F5 for Payment Entry.
- F6 for Receipt Entry.
- F7 for Journal Entry.
- F8 for Sales Entry.
- F9 for Purchase Entry.
- F10 for Reversing Entry.
- Alt + F4 for Purchase Order.
- Alt + F9 for Purchase Challan.
- Alt + F5 for Sales Order.
- Alt + F8 for Sales Challan.
- After making purchase order and challan, in order to get a purchase bill press F9.
- After making sales order and challan, in order to get a sales bill press F8.
Deleting a ledger or stock item
In order to delete a ledger go to
Gateway of tally -> Accounts info -> Ledger -> Alter -> then select the ledger and press enter -> press Alt + D -> press 'y' to confirm and 'n' to deny.
In order to delete a stock item go to
Gateway of tally -> Inventory info -> Stock item -> Alter -> then select the stock item and press enter -> press Alt + D -> press 'y' to confirm and 'n' to deny.
Subscribe to:
Comments (Atom)
